Using BACDoor™ 2.0 Mobile
Table of Contents
- Introduction
- Installing the App
- Logging in
- Using the App
- Enabling Bluetooth
- Saving & Loading Parameters to File
- Accessing the App File Directory
- Customizing the App
- Adjusting the App Layout
- Creating Your Own App Layout Profile
- Importing and Exporting Layout and Dictionary Files
- Parameter location shorthand
- Data logging
Introduction
The BACDoor™ 2.0 App is designed to give users the complete ability to adjust all the controller parameters and functions directly from their smartphone. Due to the amount of low-level access to the controller this app gives, it is NOT recommended for end-users.
Installing the App
BACDoor™ 2.0 App is available on the Apple App Store and the Google Play store.
iOS: https://itunes.apple.com/us/app/bacdoor-2-0/id1229140415?ls=1&mt=8
Android: https://play.google.com/store/apps/details?id=com.accel_droid.asi.bacdoor&hl=en
Logging in
To use the App, you are required to have an ASI Support Account username and password.
Note: Accounts are limited to ASI OEM Customers and Authorized Dealers. Accounts will not be provided to end-users.
You will be prompted for a login when you first use the App. The App will store your login information which will be valid for seven days and refresh each time you start the App. You can use the App without an internet connection for up to three days before the App will require an online password check.
Using the App
There are four areas of interest in the App.
Channels Page:
- On the first page, you see when the App is logged in.
- Lists all available devices.
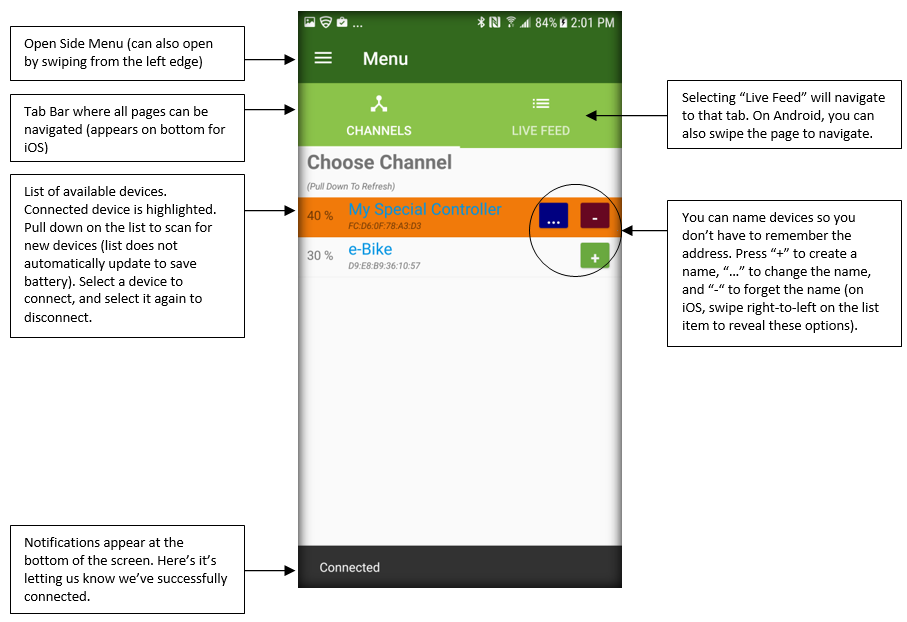
Side Menu:
- The side menu can be accessed throughout the app by swiping the left edge of the screen
- It can also be accessed by selecting “Menu” at the top-left of the “Channels” page.
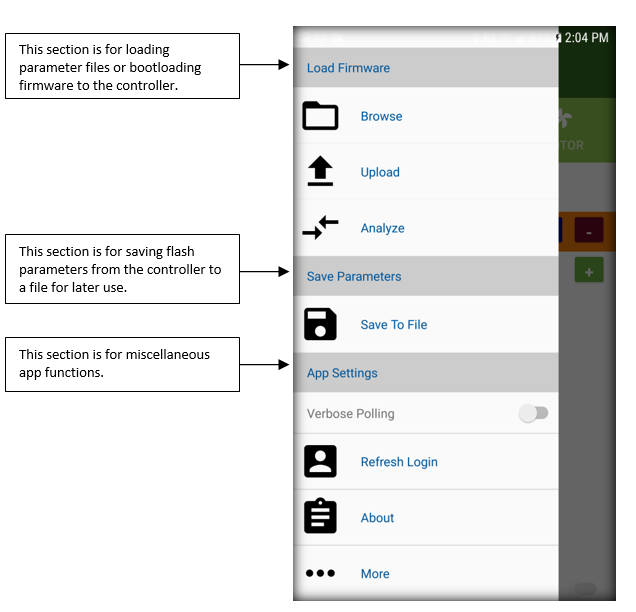
- The menu contains some common functions that can’t be achieved simply by reading & writing parameters.
Live Feed Page:
- The page contains various categories with a brief overview.
- A few parameters are listed with each category.
- Each category can be expanded further
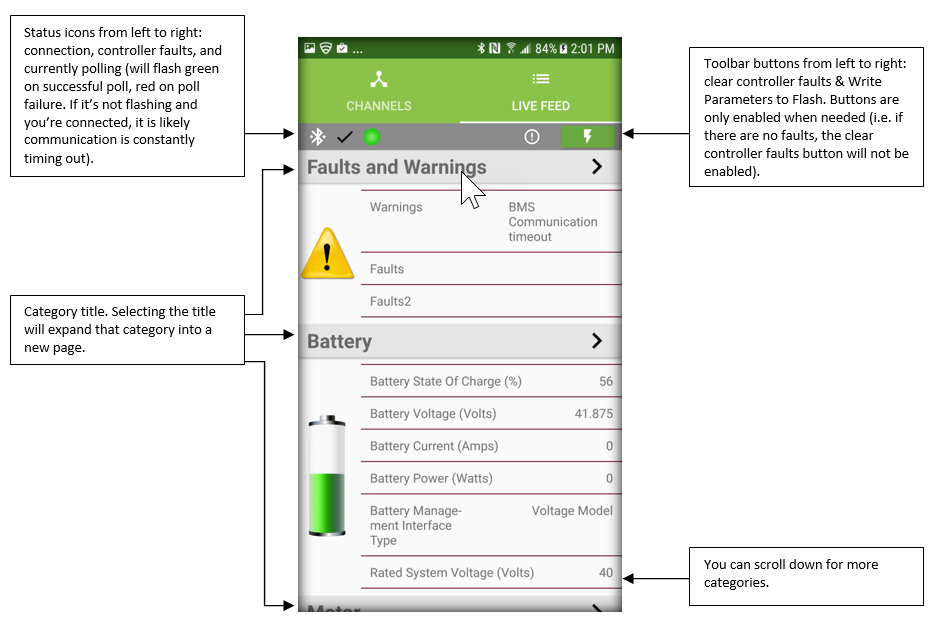
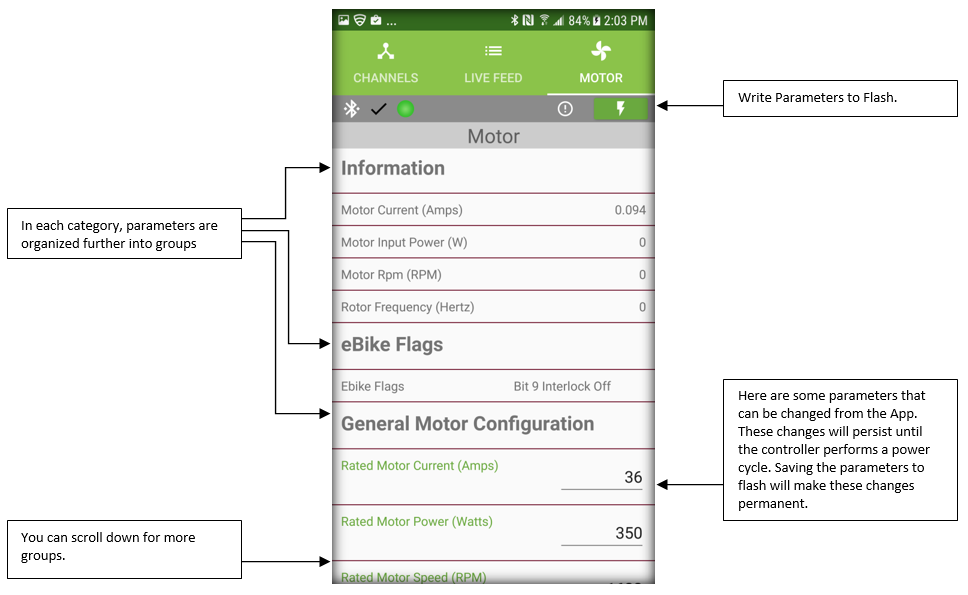
Category Pages:
- Created by Expanding a category on the Live Feed Page
- Usually contains far more detail about that category
- Some Parameters can be written to
Enabling Bluetooth
Before connecting to a Bike, please ensure that Bluetooth is enabled.
For iOS:
- Swipe up from the bottom of the screen on the home or lock screen, and select the “Bluetooth” symbol.
For Android:
- Swipe down from the top of the screen and select the “Bluetooth” symbol.
- You can also enable Bluetooth via your device’s settings. Your device may ask for your permission to allow the app to use your Bluetooth device and your location.
- For some versions of Android, you must enable Location Services. Go into the app settings and ensure location permissions are enabled. Ensure Location Services (not permission, this is something different) is enabled. Yes, you have to enable GPS to scan for Bluetooth LE devices in an app, this is a quirk of android.
Saving & Loading Parameters to File
Saving Parameters to File:
- Open up the side menu and select “Save To File”
- Select a file to overwrite or enter a new file name and press “OK”. This will save the current set of writable parameters to your device’s file directory. See “Accessing the App File Directory” section above.
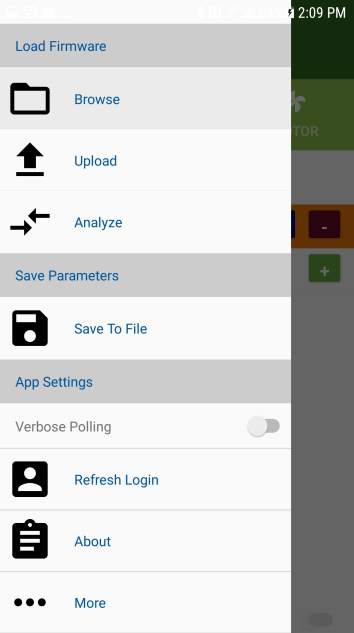
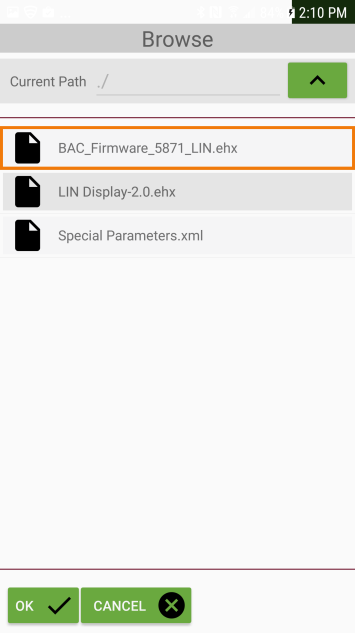
Loading Parameters from File or Bootloading Firmware:
- Open up the side menu and select “Browse”.
- Select the desired file and press “OK”.
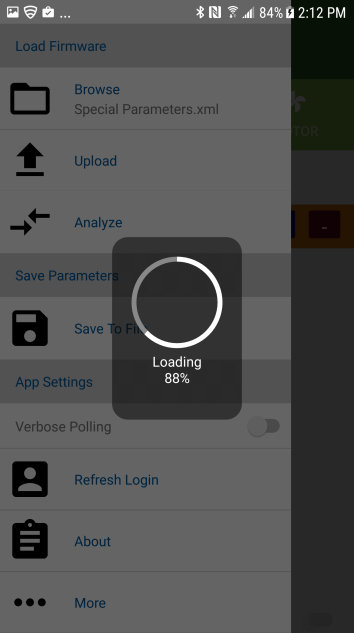
- In the side Menu again, press “Upload”.
- The App will determine the type of file you are trying to upload as well as confirm your choice with you. Press “Yes” to begin loading.
Note: You can use this feature to load the same parameter file or firmware to several different bikes if you wish.
Note: in iOS, when browsing for a file, you can select “import” to fetch a file from iCloud, DropBox, and other similar document storage apps. They will be imported into a directory called “imported” to reduce clutter.
Known issue: in Android, you will now be able to use the built-in file browser directly. However, saving to a document storage manager such as OneDrive or Google Drive currently silently fails. Please save files to your Internal Storage only.
Accessing the App File Directory
These steps will allow you to access the file directory for the App. This is necessary for various reasons, including updating the firmware on the bike, sharing parameter files, etc.
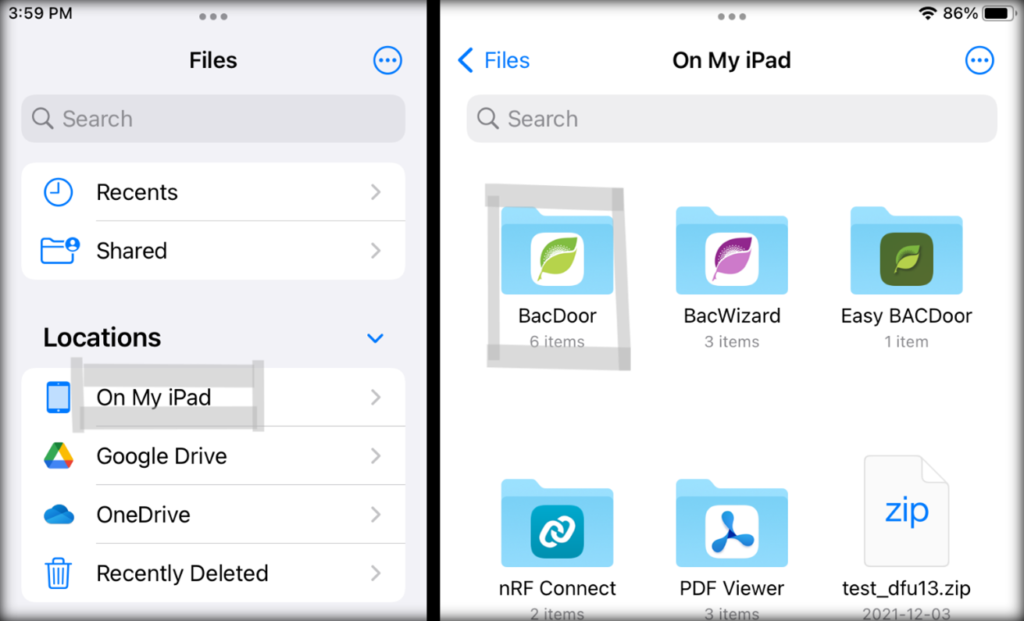
For iOS (iTunes):
You can manipulate the files directly on your iOS device with the files app.
- Open the files app.
- Select “On My Phone/iPad” under “Locations”.
- Select the “BacDoor” folder.
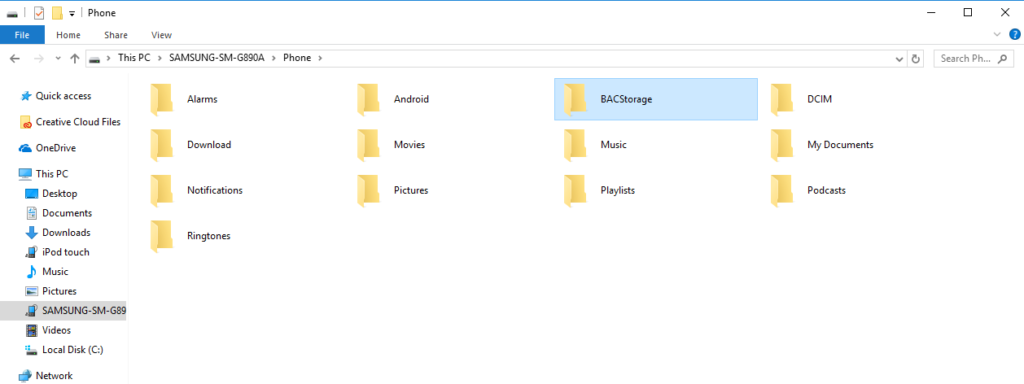
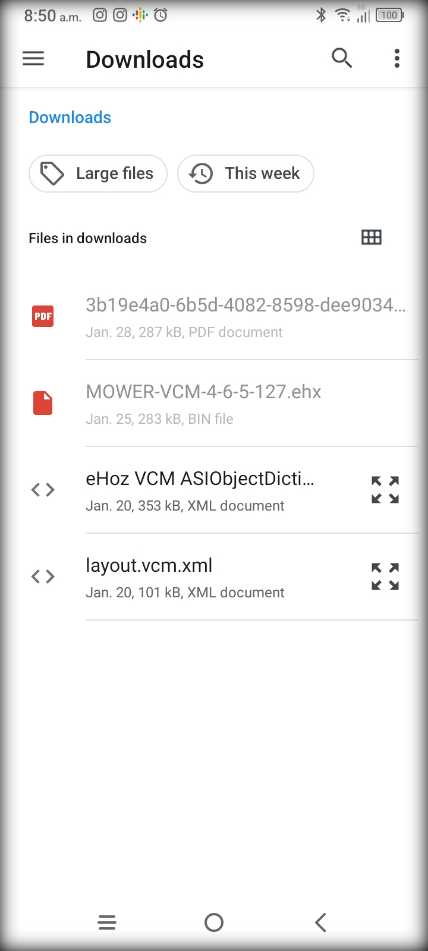
For Android:
- Connect your device via USB, and then open up the file explorer.
- Open up your device directory.
- Navigate to the Phone’s internal storage, and then add or remove files like you would any other directory. Recommended spot for files is “Downloads” or “Documents”.
Most Android phones also have a file explorer built-in which you can use to access this folder.
Note: older versions of BACDoor used to create a folder called “BACStorage” in the root of the phone’s storage. This is no longer allowed, but users who upgrade BACDoor on older phones may still see this folder.)
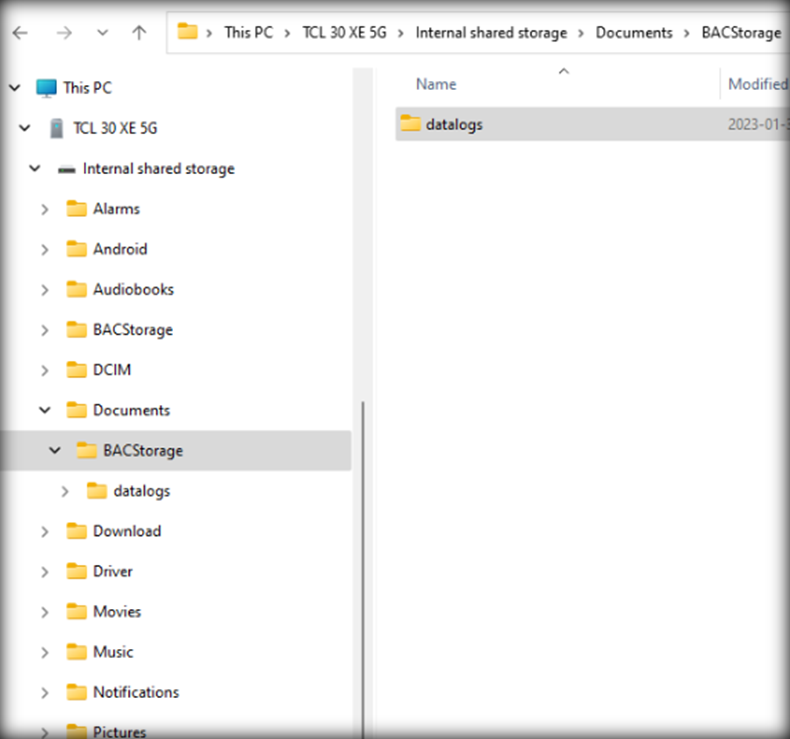
Android Datalogs:
When the app is datalogging, it automatically creates and stores the files in your phone’s “Documents” in a folder called “BACStorage” > “datalogs”.
Customizing the App
The app is easily customizable, with the ability to insert and remove parameters, create your own groups, import your own layout, etc. The app layout is based on two concepts: a layout file and a dictionary file.
App Dictionary: This file stores the parameters of your device, with each parameter having several characteristics such as its description, a way to scale the number into something human readable, its units, whether it’s a bit vector or not, and whether it’s writable or not. You cannot adjust the dictionary in the app, but you can import new ones.
App Layout file: This file stores how the parameters are displayed, including groups and order. This can be customized item by item in the app, but you can also import and export layout files to easily share among several devices.
Each layout and dictionary file is tied to a “profile” within the app. The app currently has no way to detect what device you’re connected to, so it relies on the dictionary and layout being correct for that device. You should create a profile for each device type you want to connect with, whether it be two BAC Controllers with vastly different firmware versions, or ASI’s custom VCM (vehicle control module).
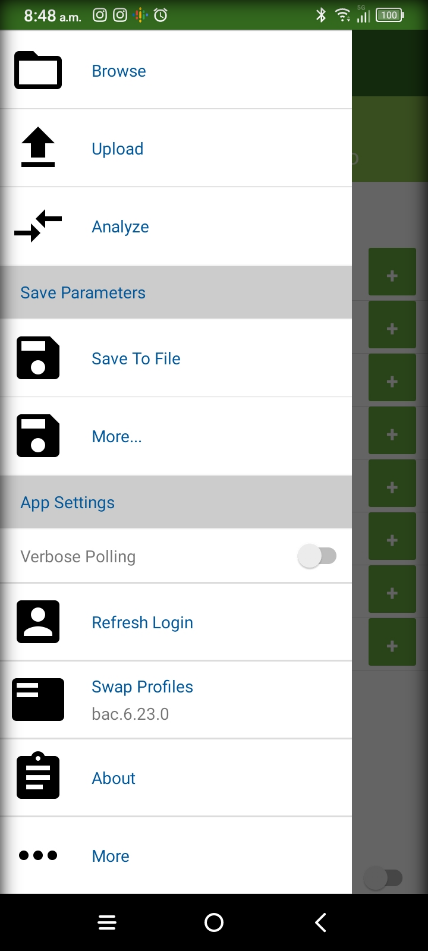
Swapping Between Different App Layout Profiles
If you regularly deal with multiple ASI device types requiring their own dictionary and/or layout, you can easily swap between them from the menu.
- Open up the side menu and select “Swap Profiles”.
- Select the profile that best suits your device.
Any layout changes you make will only be reflected on this profile.
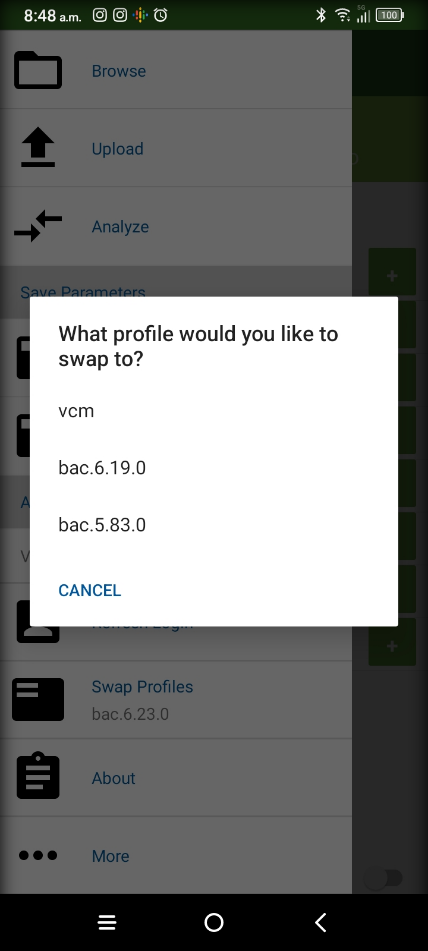
(Note: the app only comes with one profile when you first install it, likely consisting of a layout and dictionary for the latest BAC firmware at the time of release. You can create additional profiles yourself, see “Creating Your Own App Layout Profile”.)
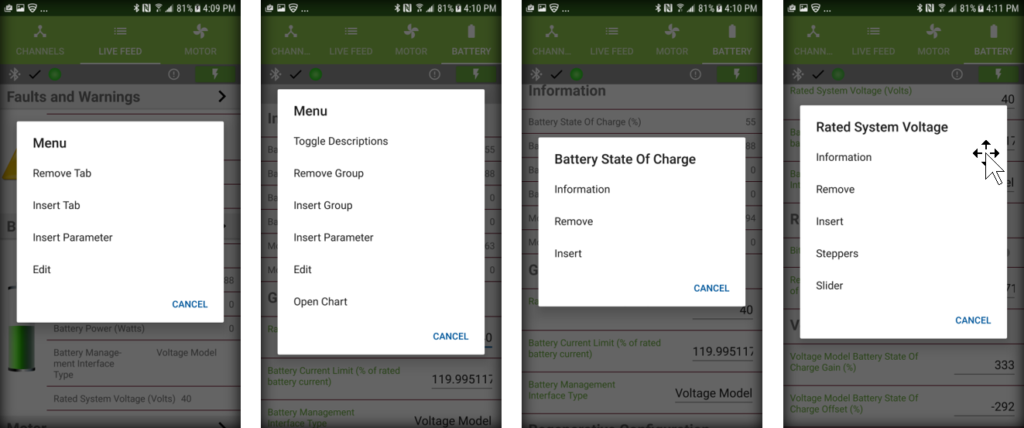
Adjusting the App Layout
If you aren’t happy with either layout, you can customize it to your liking.
- To add, delete, or edit a category, group or parameter, press and hold ANY item for a few seconds, and a pop-up will appear.
- Some Parameters have extra features that allow you to customize whether a slider or stepper is shown.
- Any changes you make to the layout will automatically be saved.
Remember that any changes you make will only be reflected on your selected profile.
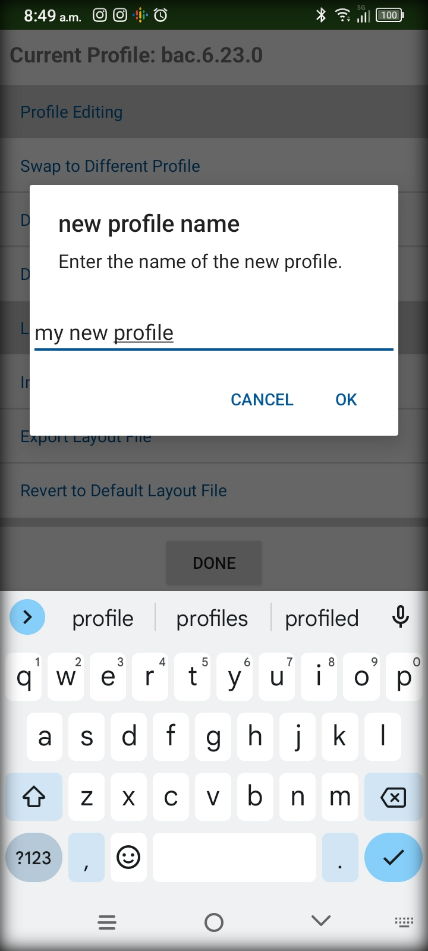
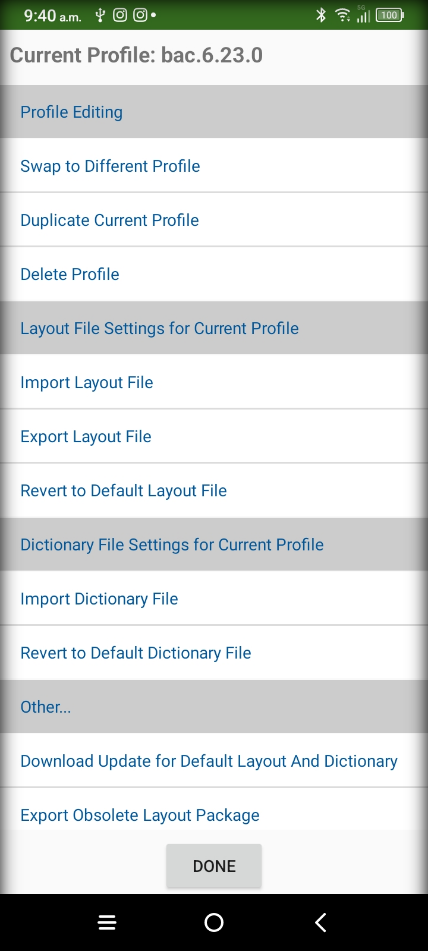
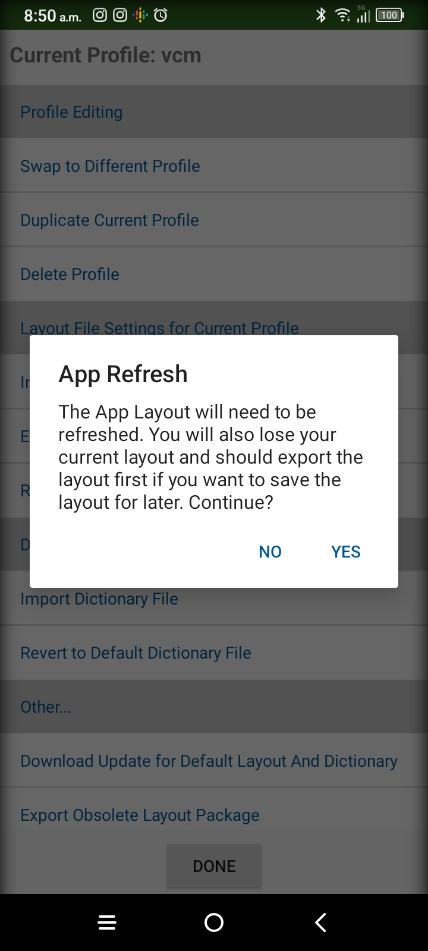
Creating Your Own App Layout Profile
The default app starts out with only one profile. To create your own, follow these steps:
- Open up the side menu and select “More”.
- Select “Duplicate Current Profile”.
- Choose a name that best describes the device or firmware you wish to connect to.
This creates a duplicate of your currently selected profile. Then you can Swap to that profile and begin making adjustments to the layout or import a new layout or dictionary.


Note: You can also delete profiles, but the app will not let you remove the profile you are currently using.
Importing and Exporting Layout and Dictionary Files
Creating application layout files from scratch can be tedious. Thus BACDoor allows you to share and import layout and dictionary files. When you choose to import a file, it gets applied to the profile currently being used, so take care to ensure the correct profile is currently set before importing.
Known issue: in Android, you will now be able to use the built-in file browser directly. However, exporting to a document storage manager such as OneDrive or Google Drive currently silently fails. Please export files to your Internal Storage only.
Parameter location shorthand
Parameter locations in the application can be quickly referred to by this shorthand: [BACDoor Mobile|Tab|Page|Section|Parameter]
Example: [BACDoor Mobile|Live Feed|Battery|General Configuration|Rated system voltage] refers to the parameter, Rated system voltage, location.
Data Logging
BACDoor™ is capable of data logging several Parameters at once.
How to Datalog
- Press and hold ANY of the group titles in ANY Category page.
- A pop-up menu will appear. Select “Open Chart” at the bottom.
- An empty graph will appear. Select “Start” to begin data logging. You should see the values change rapidly while recent values populate the graph.
- While data logging, the phone display will not turn off on its own. Do not close the App or lock the phone.
- When you are done, select “Stop” (or “Close”) when finished. The graph will re-populate itself with all the previously logged data. You can zoom in and scroll the data, or press “Peek” to open the file in another app.
Caution: While data logging, DO NOT turn the controller OFF and ON rapidly. Doing so may cause undesirable effects. If you must turn off the controller, wait a few seconds before turning it back on.
Reading the Data
- The datalogger will have created a .CSV file in the app directory which can be opened in Excel, Numbers, or several other spreadsheet programs.
- The file name will be the date and time you started data logging, followed by the group name. Inside the file will be a timestamp and device ID for each sample.
- For instructions on how to access the App directory, see “Accessing the App File Directory.”